How-To Guides
Create a Sponsor API Key
Learn how to create and manage a Sponsor API Key for gas sponsorship
1
Create Your Gelato Account
Sign up on the Gelato App to establish an account. This account is the foundation for setting up relay tasks and managing gas sponsorships.
2
Create a Relay App
Within your Gelato account, create a relay app on the specific network where you plan to sponsor transactions. This step enables sponsored transactions on your chosen chain. Checkout supported networks here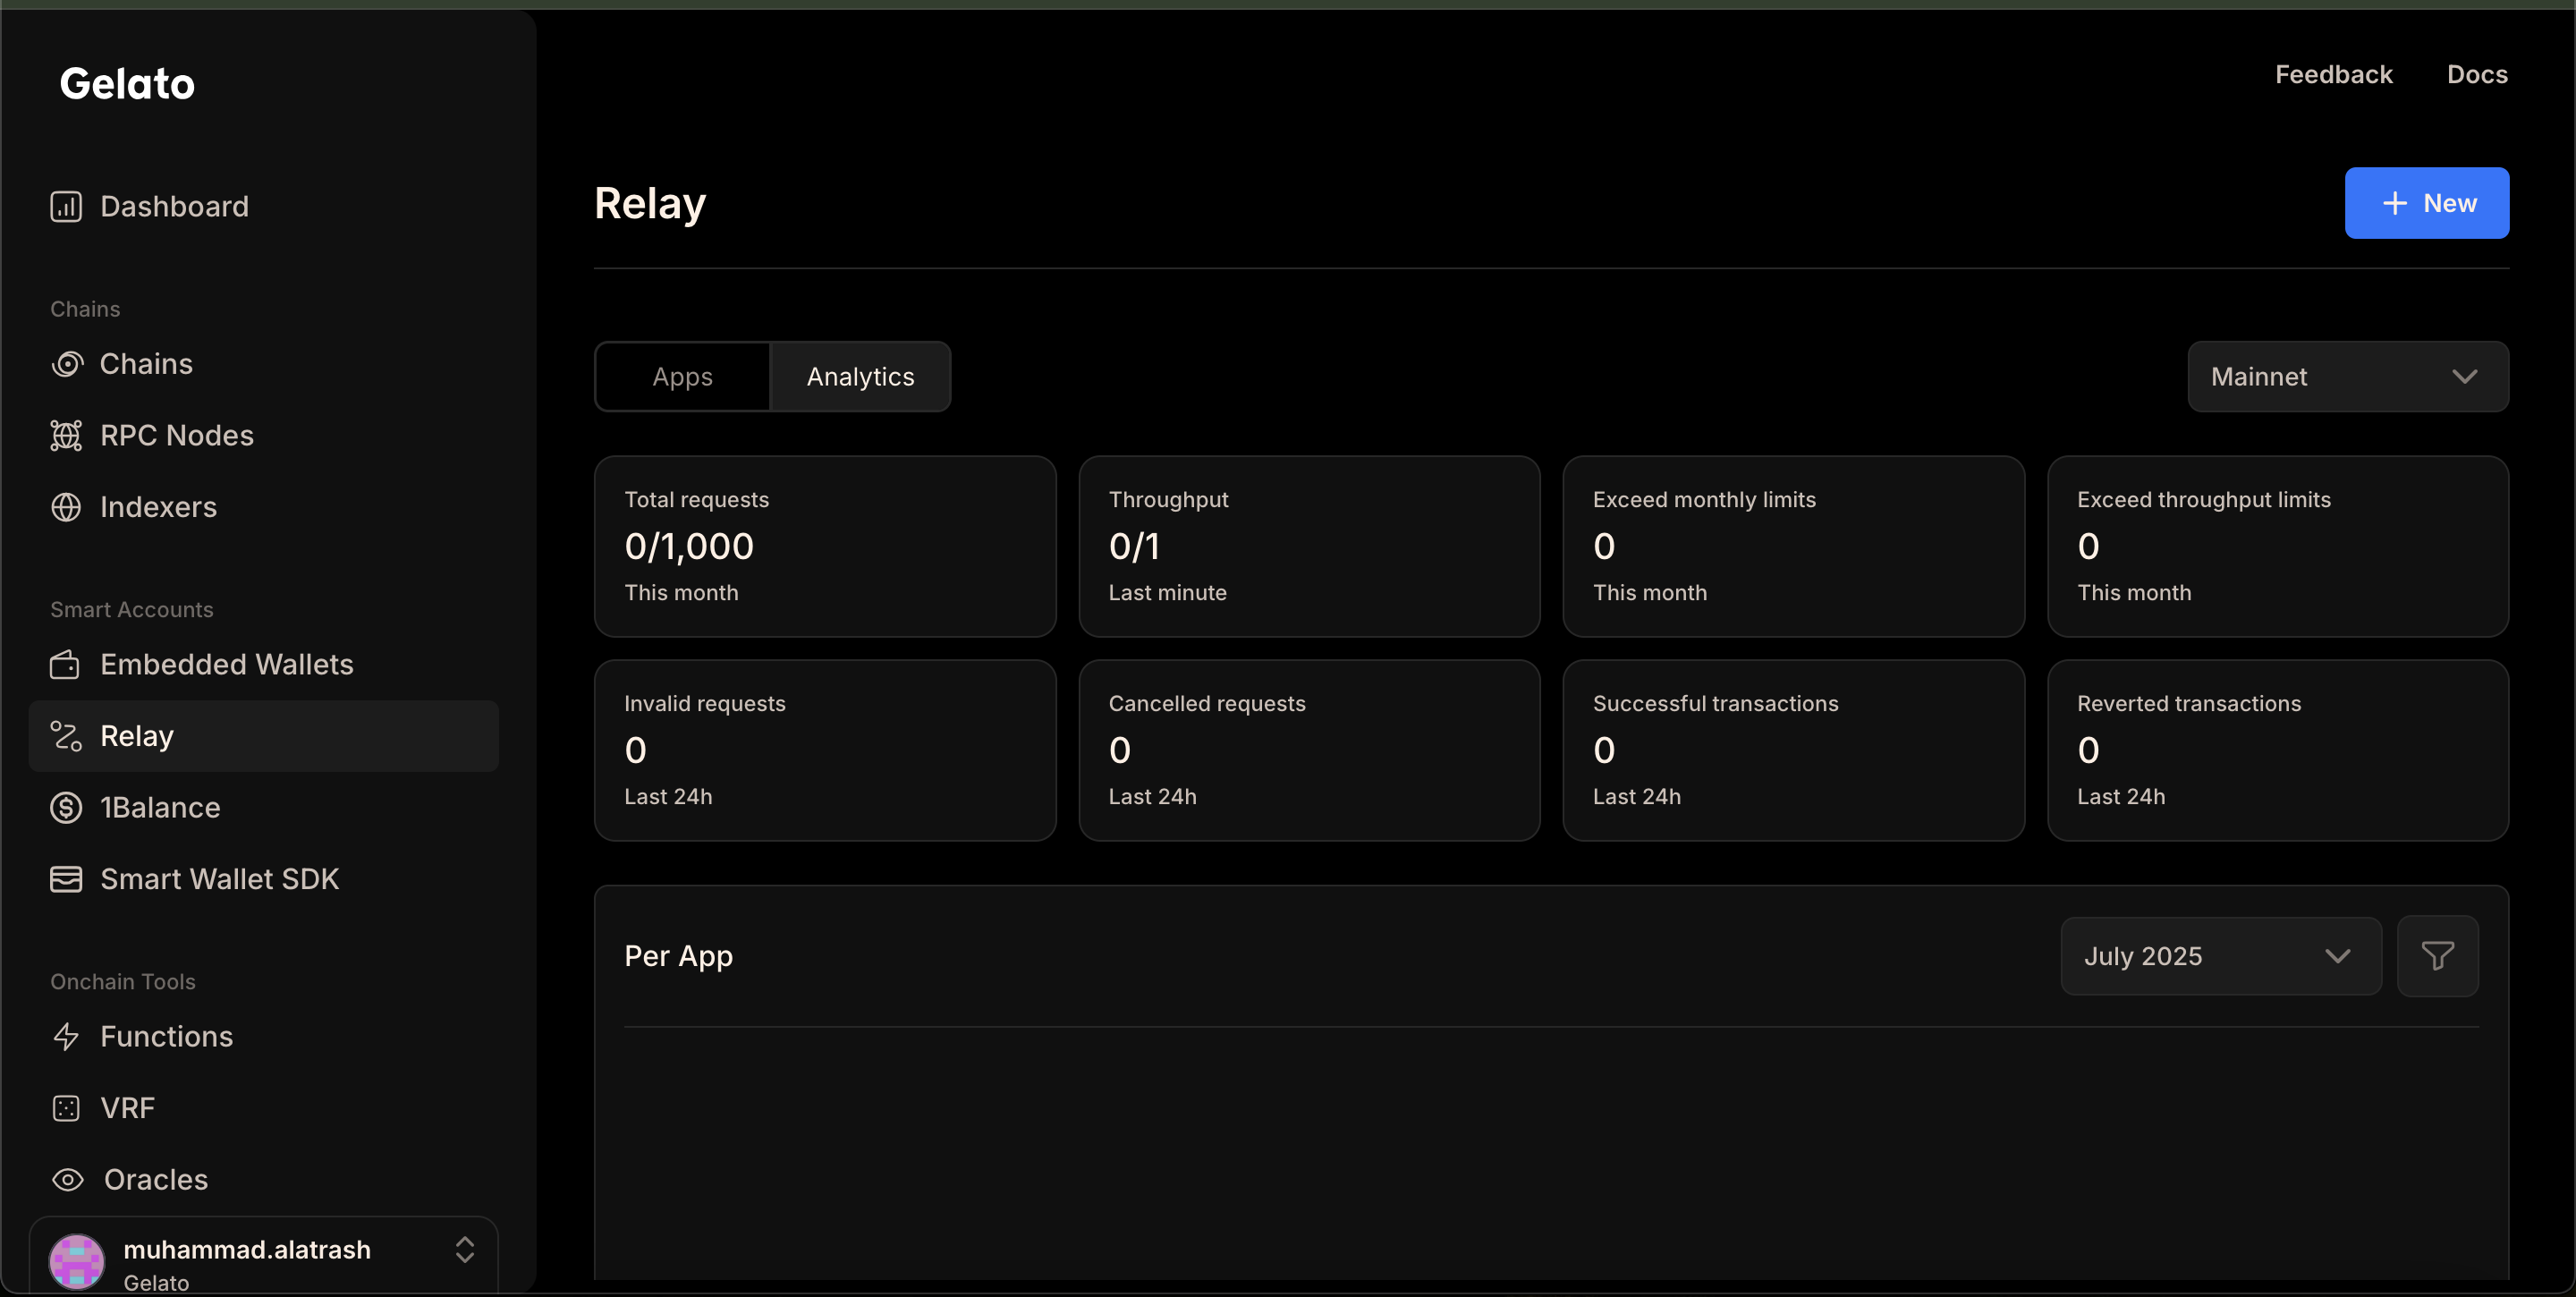
3
Retrieve Your Sponsor API Key
After creating the relay app, navigate to its dashboard to locate your Sponsor API Key. This key links your Gelato setup with 1Balance for gas sponsorship.
Gelato Relay now supports API key rotation, allowing users to create and delete API keys. This helps prevent unauthorized usage in case an API key is exposed.
4
Activate your Sponsor API Key
Activate your sponsor API key by allowing access to all contracts on a network, or restrict it to specific contracts or specific functions.Here, you can configure different networks. For each network, you can choose to allow access to all target contracts or limit it to selected contracts or specific functions.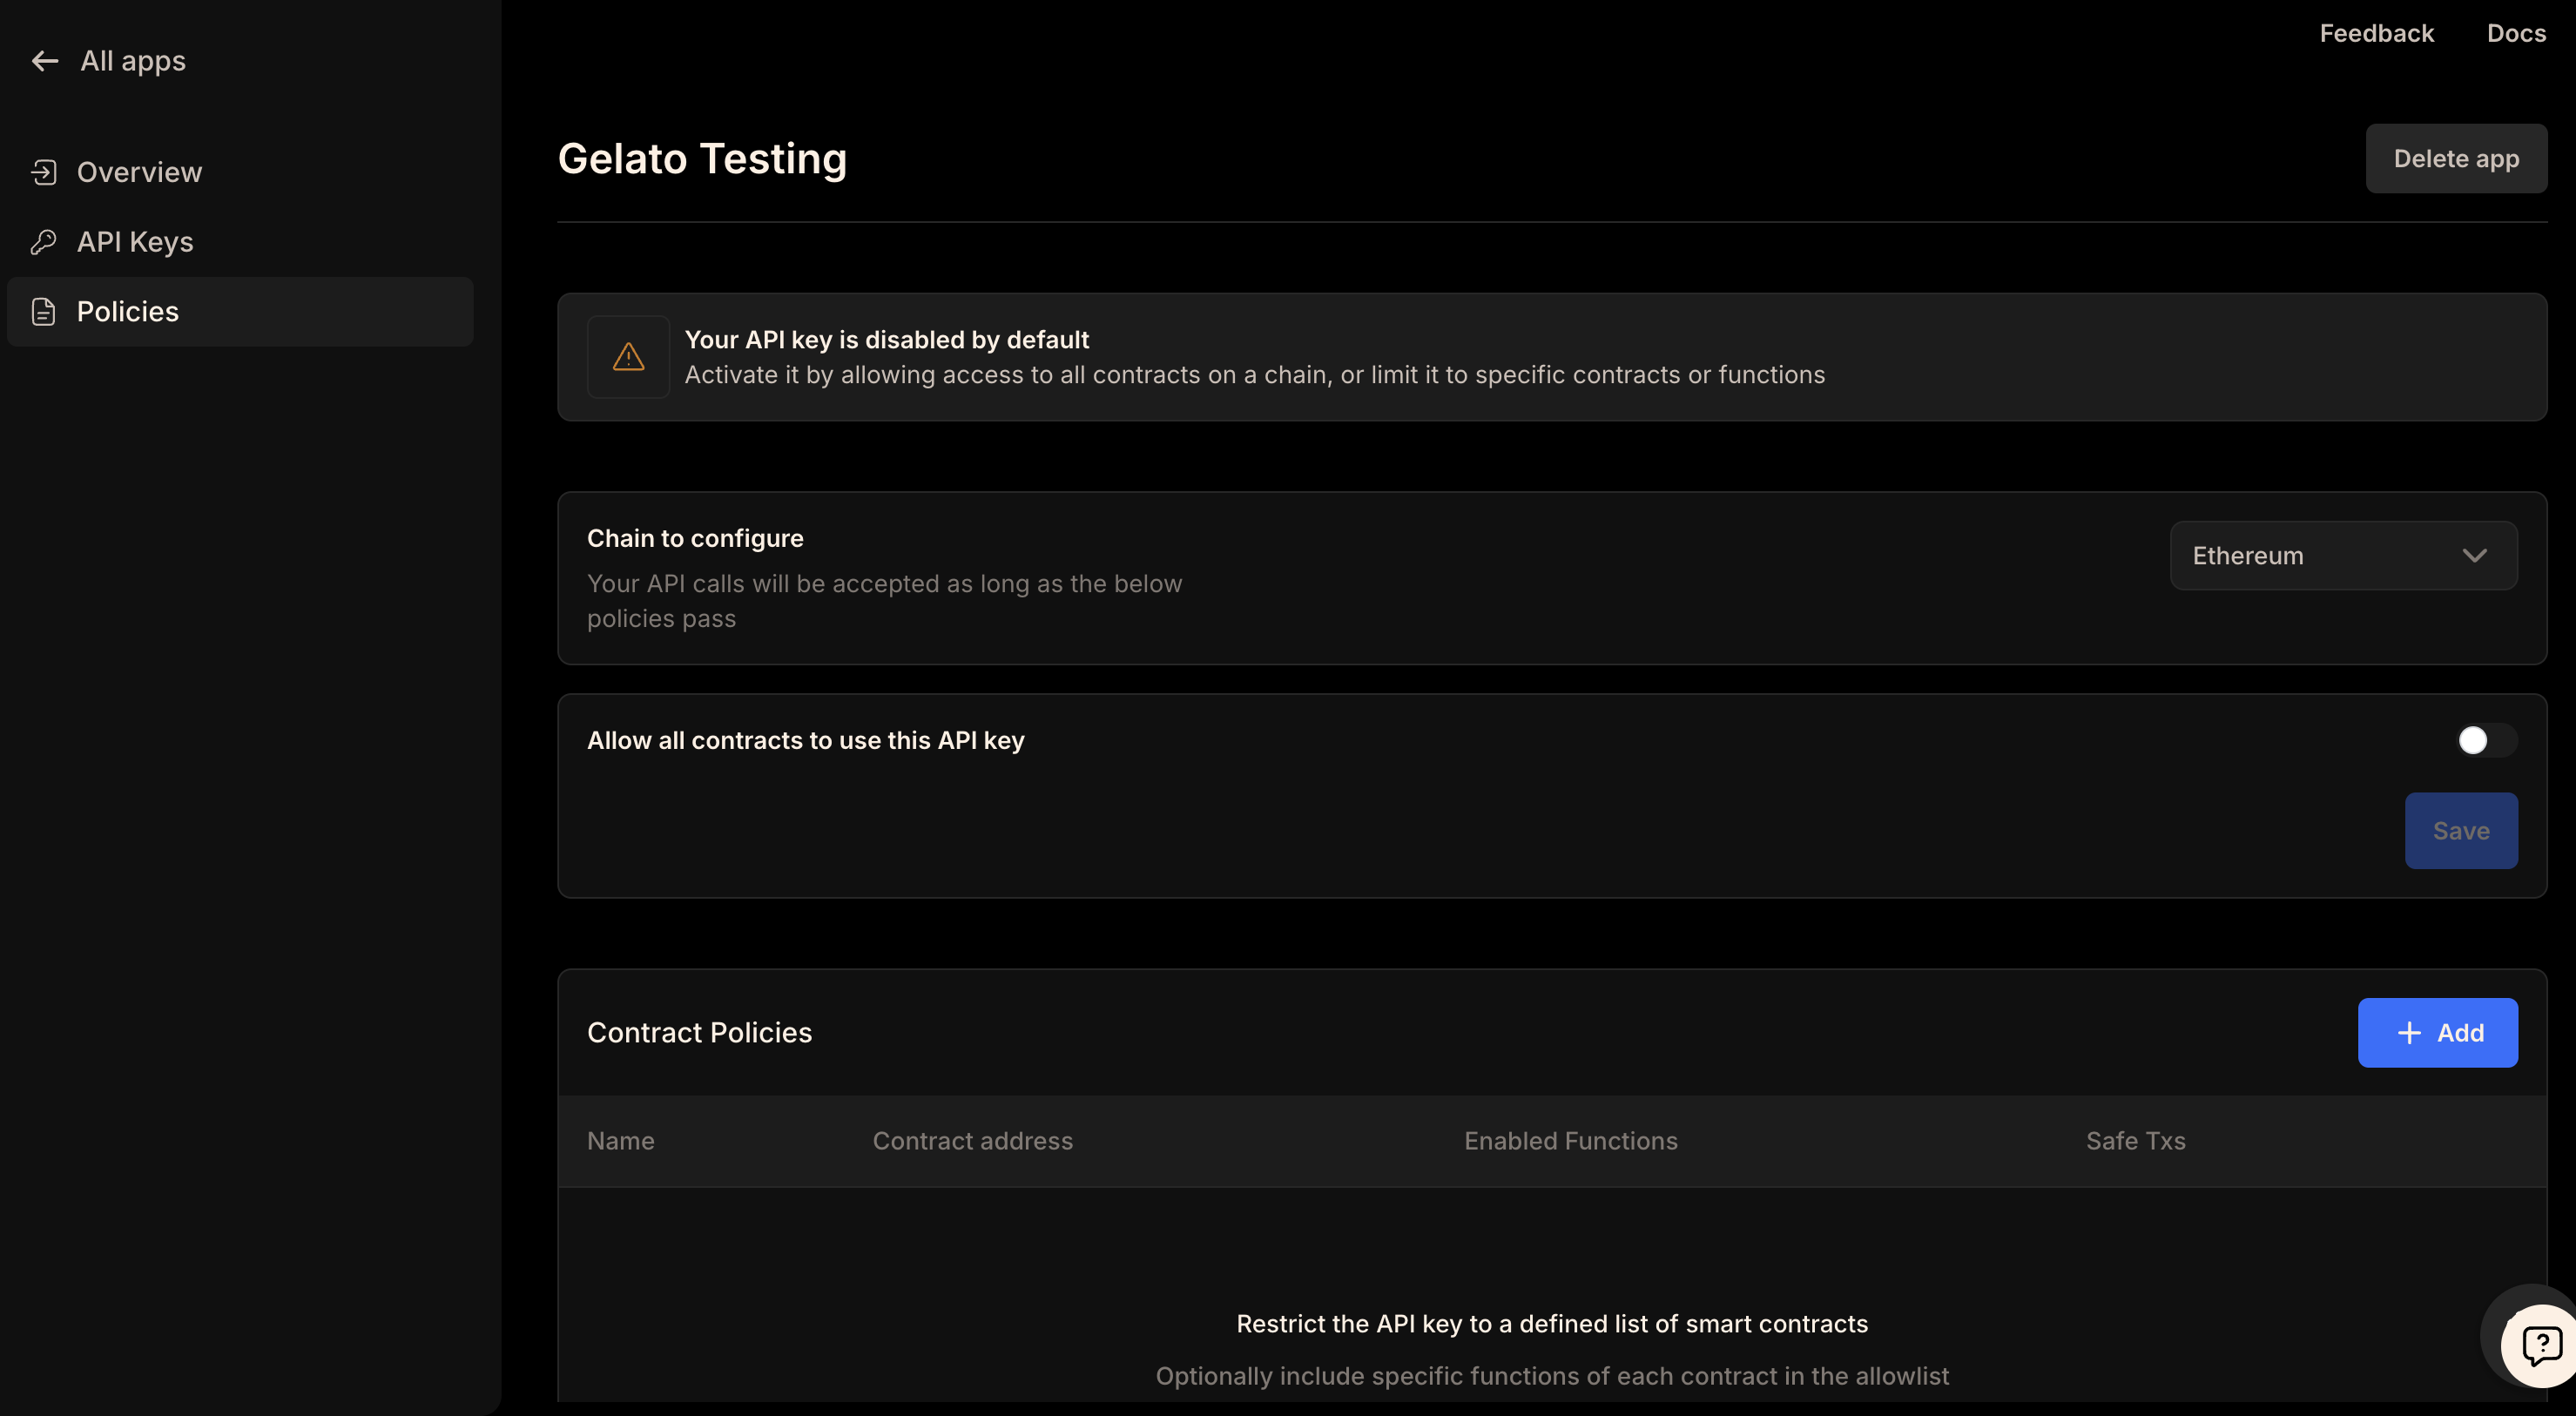
5
Deposit Funds into 1Balance
Add funds to your 1Balance account according to your target environment: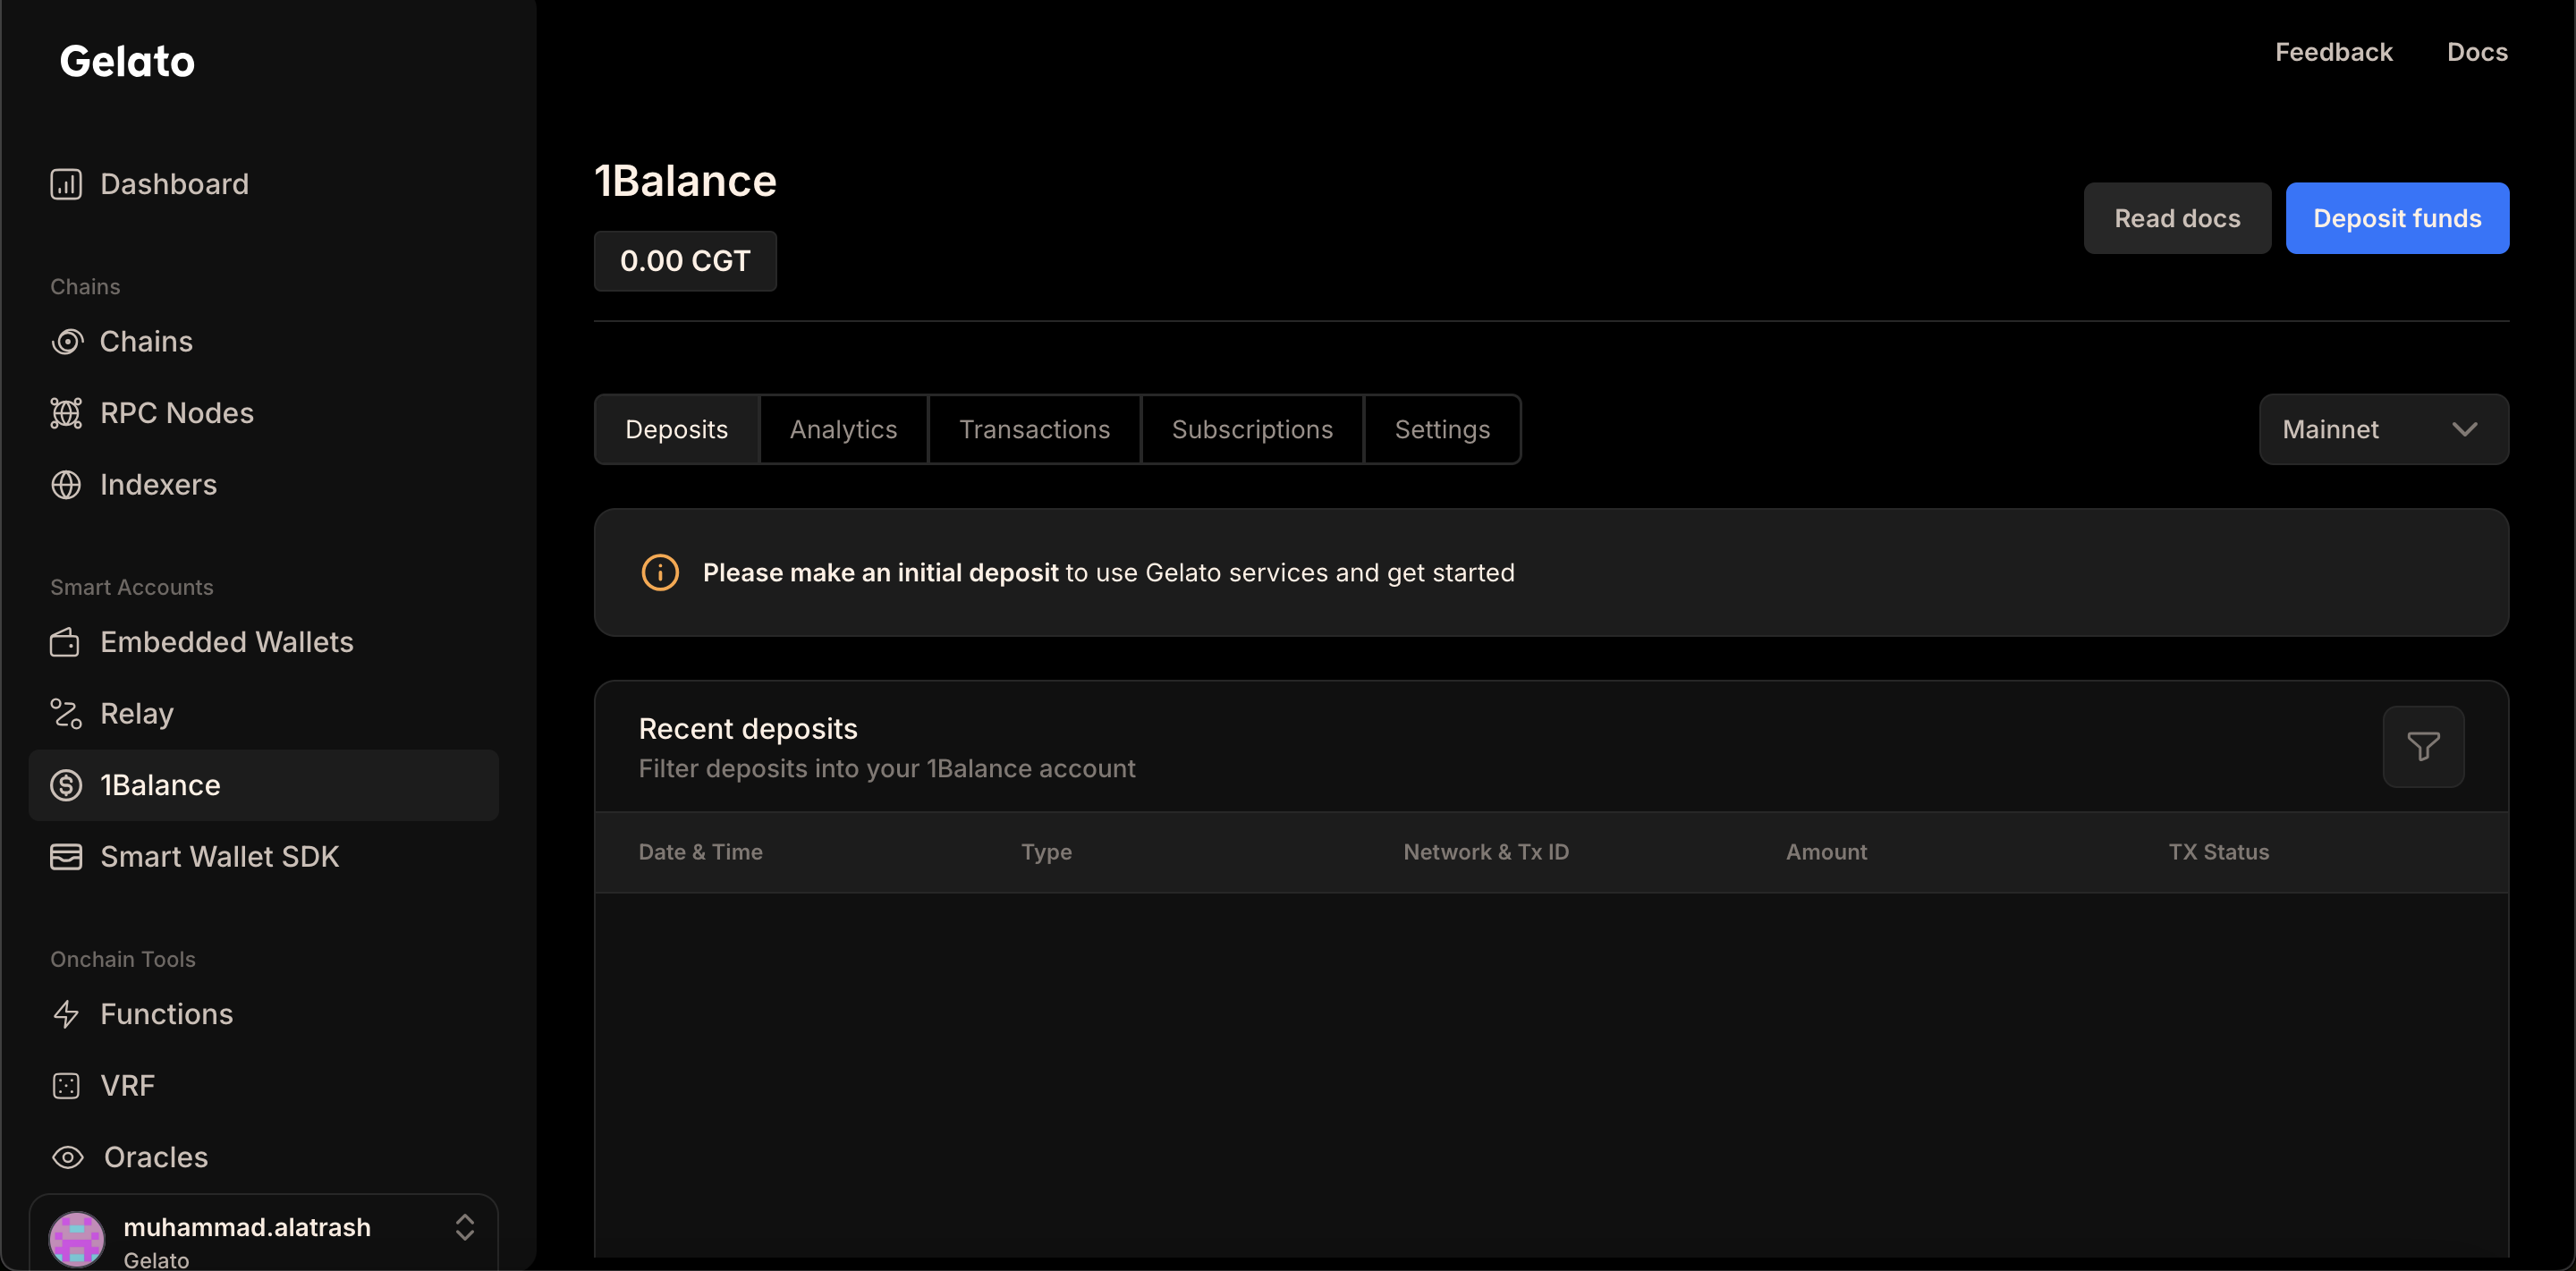
- Mainnets: Deposit USDC.
- Testnets: Deposit Sepolia ETH.