> ## Documentation Index
> Fetch the complete documentation index at: https://docs.gelato.cloud/llms.txt
> Use this file to discover all available pages before exploring further.
# Create a VRF Task
Creating your Gelato VRF Task is a straightforward process. Here's a step-by-step guide to get you started:
To upgrade your VRF task to version V1.2, please follow these steps:
1. Navigate to your existing task on the Gelato platform. Ensure you're on the correct network where your task is active. Click on the "Upgrade" button.
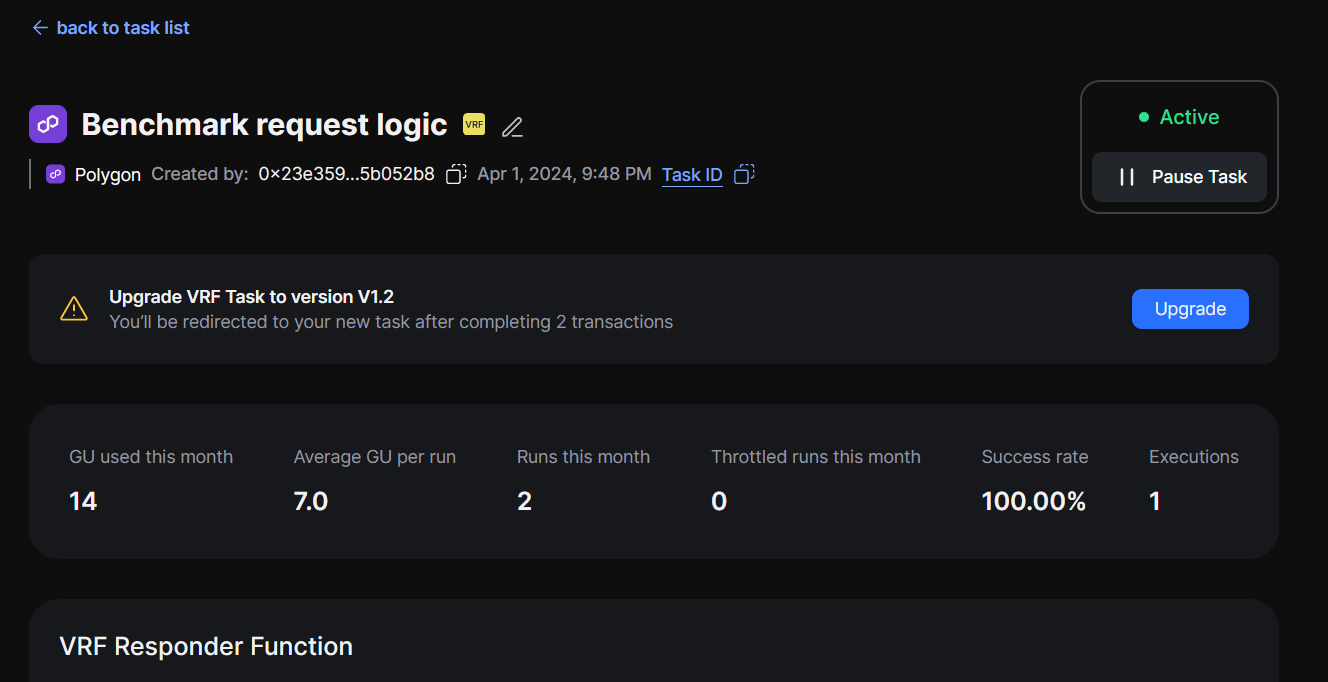 2. A transaction prompt will appear asking you to confirm the upgrade. This process will create a new task and simultaneously pause the old one.
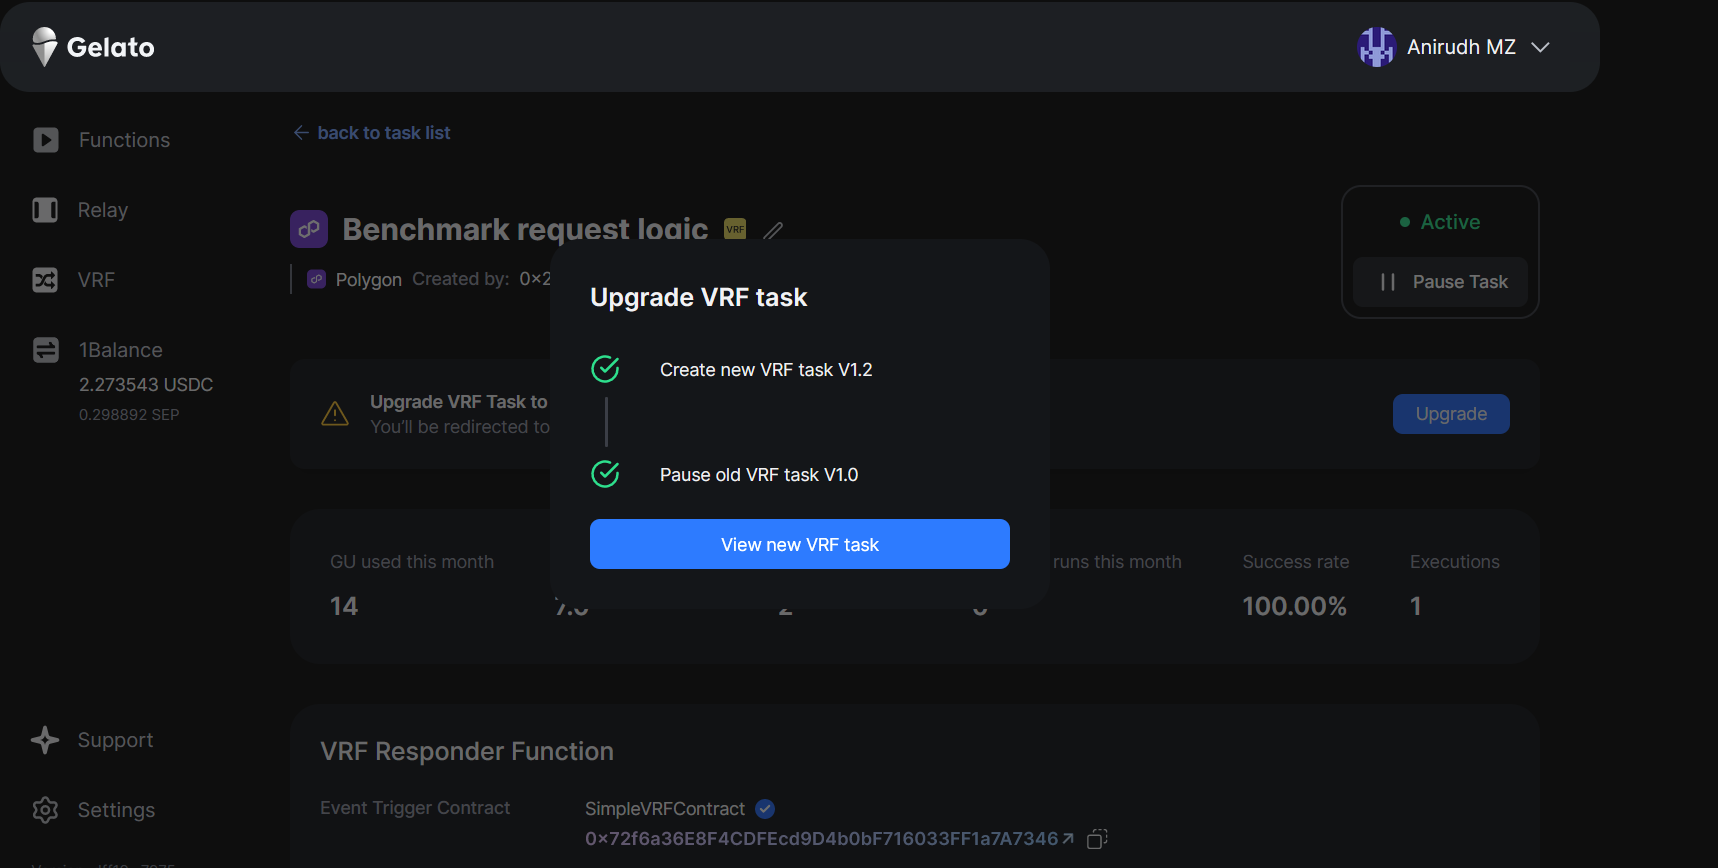 3. After confirming the transaction, you will notice that the task label updates to "VRF v1.2," indicating that the upgrade is complete.
 ## 1. Gather Necessary Addresses
Before you begin, make sure you have the address of your requester contract at hand. This will be essential for the deployment process.
Head over to the [VRF Quick Start guide](/vrf/how-to-guides/deploy-your-contract-inheriting-gelato-vrf) to learn how to prepare your contract for requesting randomness.
## 2. Access the VRF Deployment Portal
Navigate to the [Gelato app](https://app.gelato.cloud).
## 3. Choose your VRF Type
When prompted to select the VRF type, opt for "Gelato VRF". If you previously deployed a Chainlink consumer contract and wish to transition, refer to the [Migrate from Chainlink VRF](/vrf/how-to-guides/migrate-from-chainlink-vrf) section.
Or, if you already have a VRF task and want to cover all the missing events, you can set up a fallback task to ensure completeness, refer to the [Create a Fallback VRF](/vrf/how-to-guides/create-a-fallback-vrf) section.
## 4. Select Deployment Network
Ensure you choose the same network where both your VRF requester and receiver contracts are deployed.
## 1. Gather Necessary Addresses
Before you begin, make sure you have the address of your requester contract at hand. This will be essential for the deployment process.
Head over to the [VRF Quick Start guide](/vrf/how-to-guides/deploy-your-contract-inheriting-gelato-vrf) to learn how to prepare your contract for requesting randomness.
## 2. Access the VRF Deployment Portal
Navigate to the [Gelato app](https://app.gelato.cloud).
## 3. Choose your VRF Type
When prompted to select the VRF type, opt for "Gelato VRF". If you previously deployed a Chainlink consumer contract and wish to transition, refer to the [Migrate from Chainlink VRF](/vrf/how-to-guides/migrate-from-chainlink-vrf) section.
Or, if you already have a VRF task and want to cover all the missing events, you can set up a fallback task to ensure completeness, refer to the [Create a Fallback VRF](/vrf/how-to-guides/create-a-fallback-vrf) section.
## 4. Select Deployment Network
Ensure you choose the same network where both your VRF requester and receiver contracts are deployed.
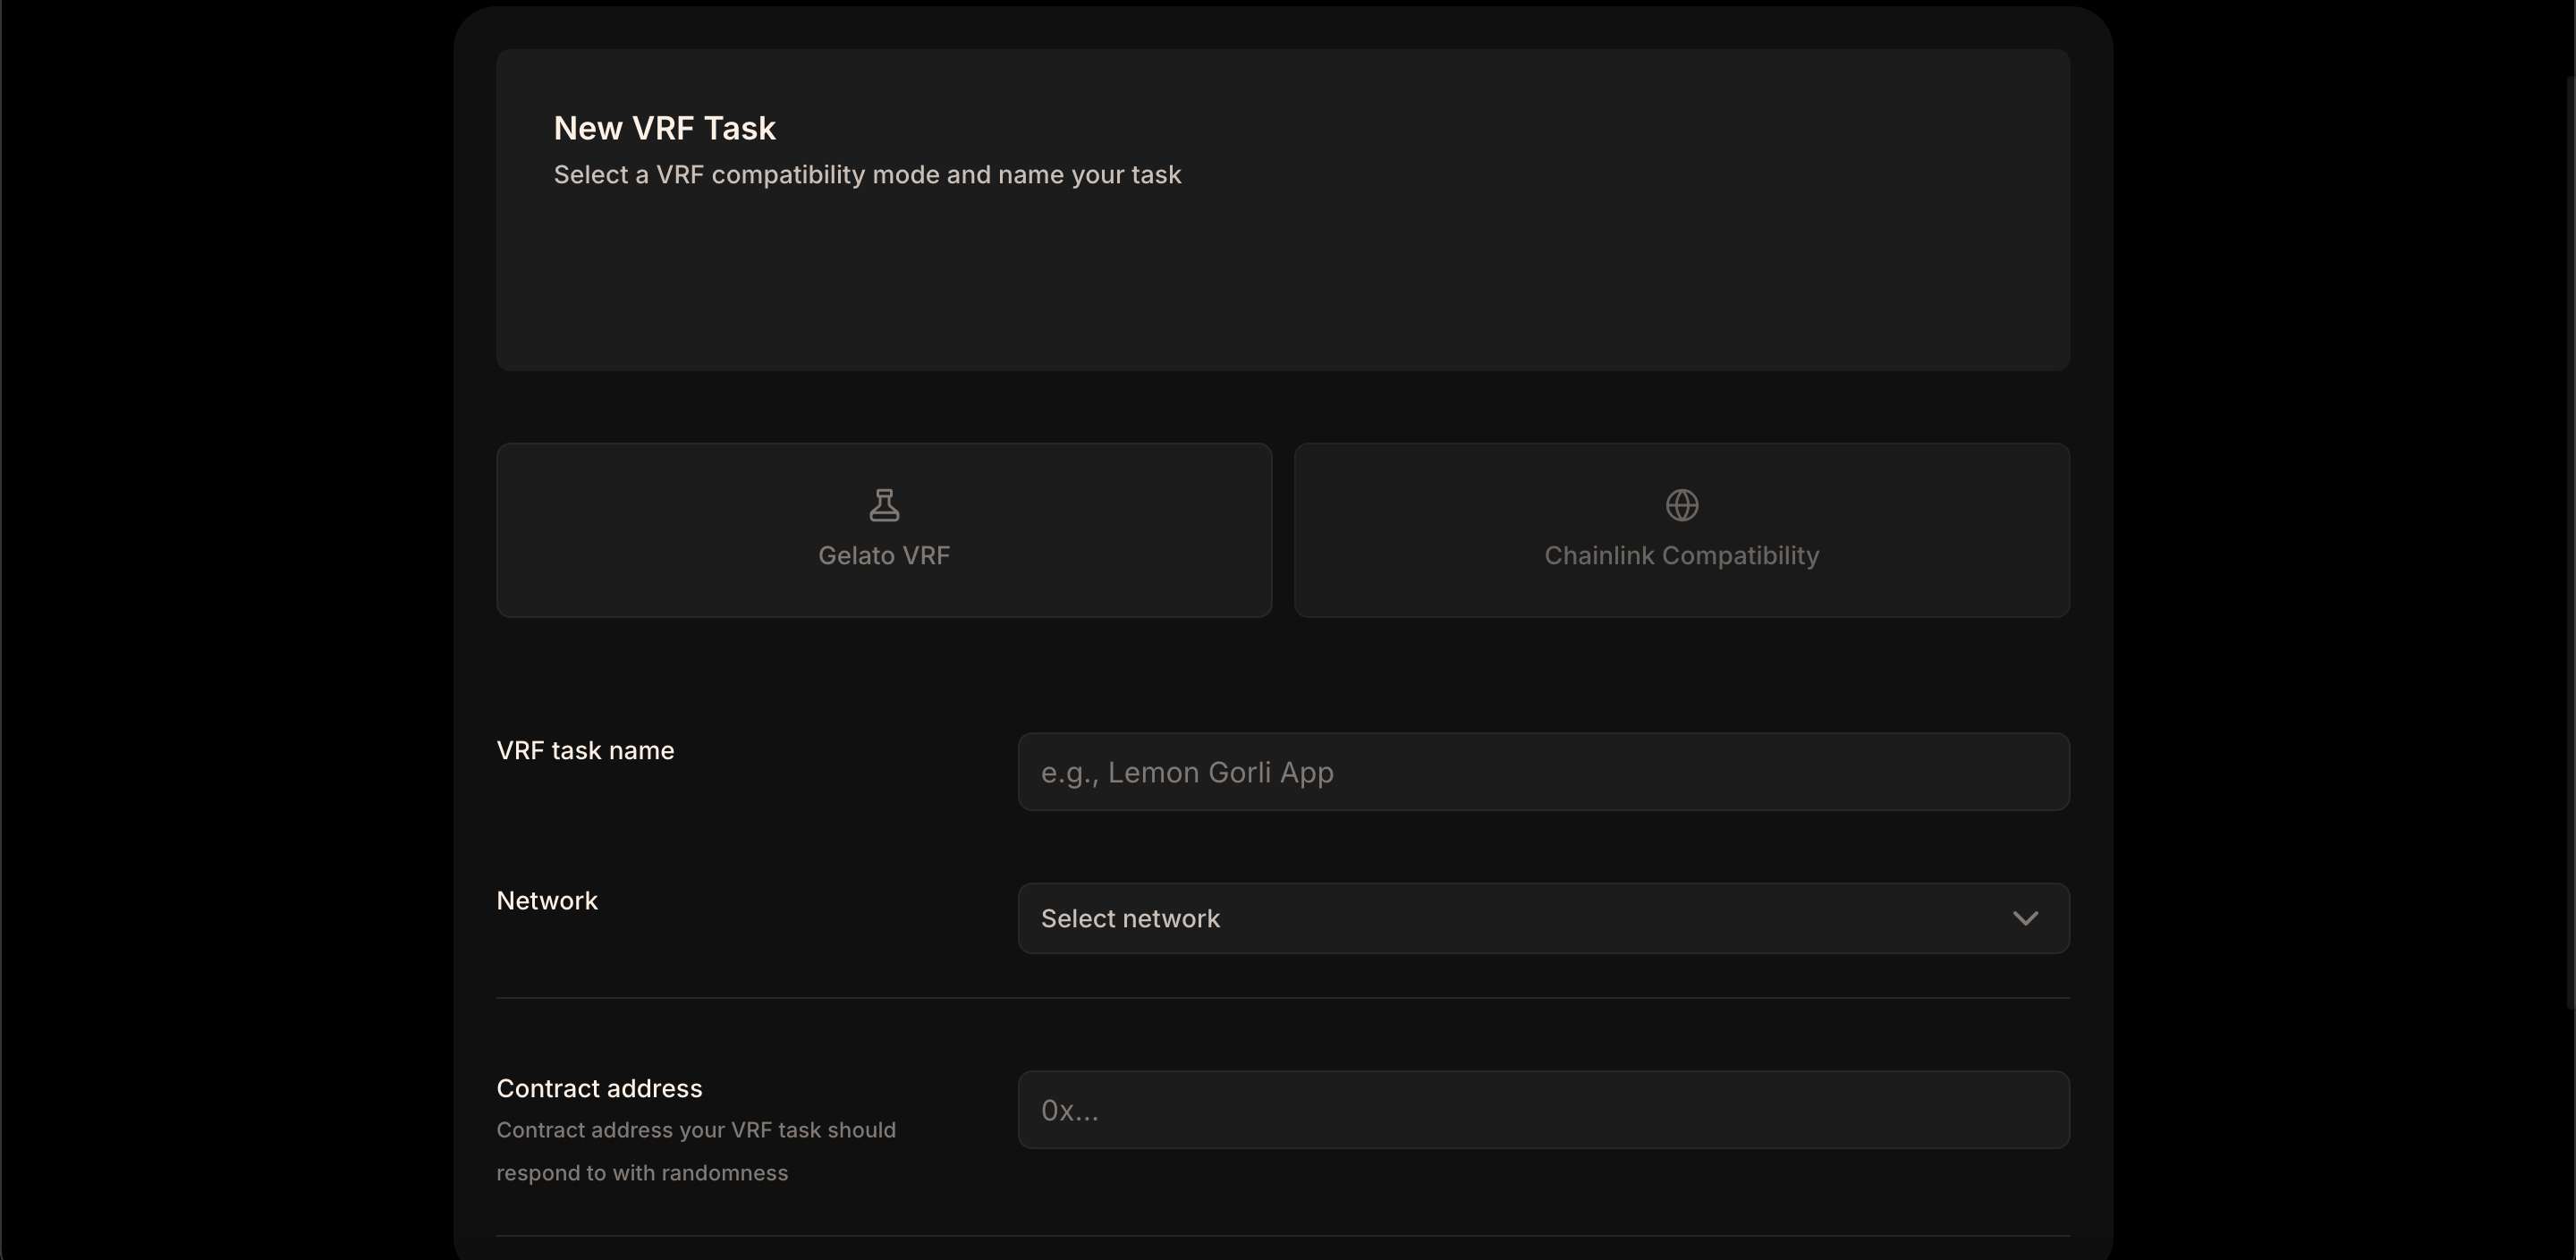 ## 5. Specify the Request Contract
You'll be asked to provide the address of the Request Contract to which the Gelato nodes should respond. Enter the address you gathered in step 1.
## 6. Launch your VRF Instance
Once all details are correctly entered, go ahead and launch your Gelato VRF instance.
## 5. Specify the Request Contract
You'll be asked to provide the address of the Request Contract to which the Gelato nodes should respond. Enter the address you gathered in step 1.
## 6. Launch your VRF Instance
Once all details are correctly entered, go ahead and launch your Gelato VRF instance.