How-To Guides
Create a VRF Task
Creating your Gelato VRF Task is a straightforward process. Here’s a step-by-step guide to get you started:
Upgrade your VRF Task v1.2
Upgrade your VRF Task v1.2
To upgrade your VRF task to version V1.2, please follow these steps: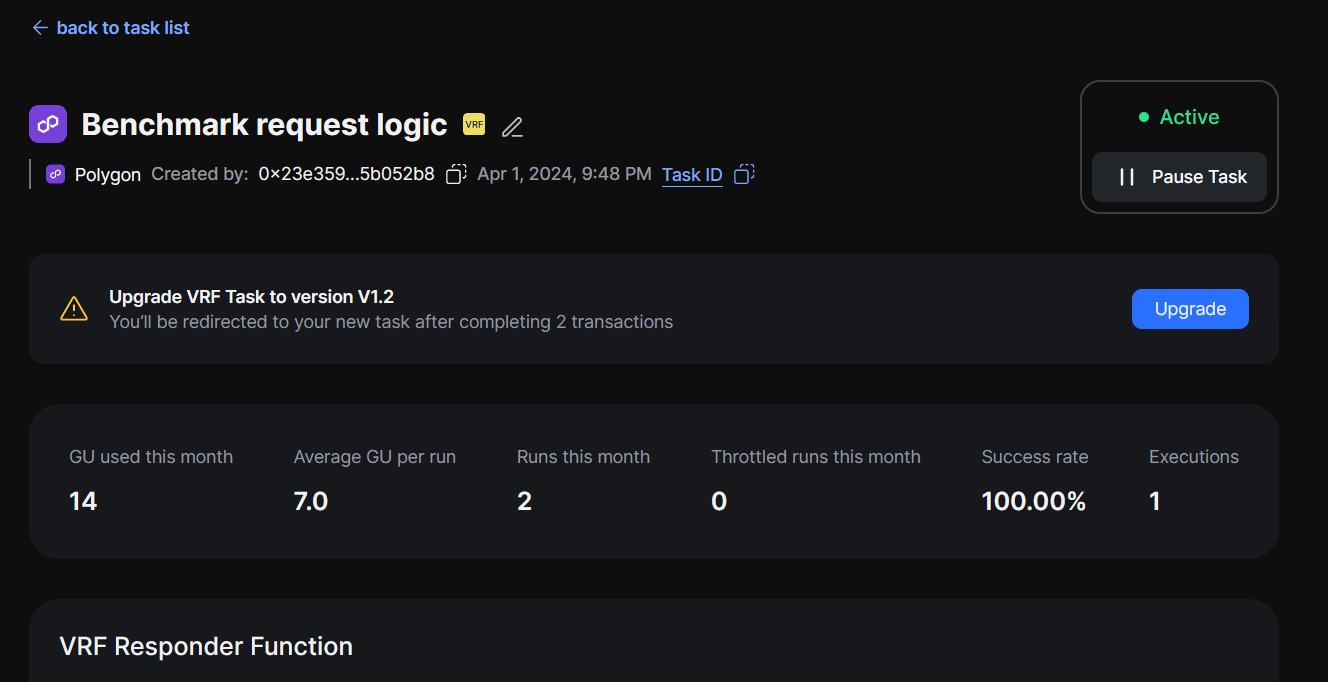

- Navigate to your existing task on the Gelato platform. Ensure you’re on the correct network where your task is active. Click on the “Upgrade” button.
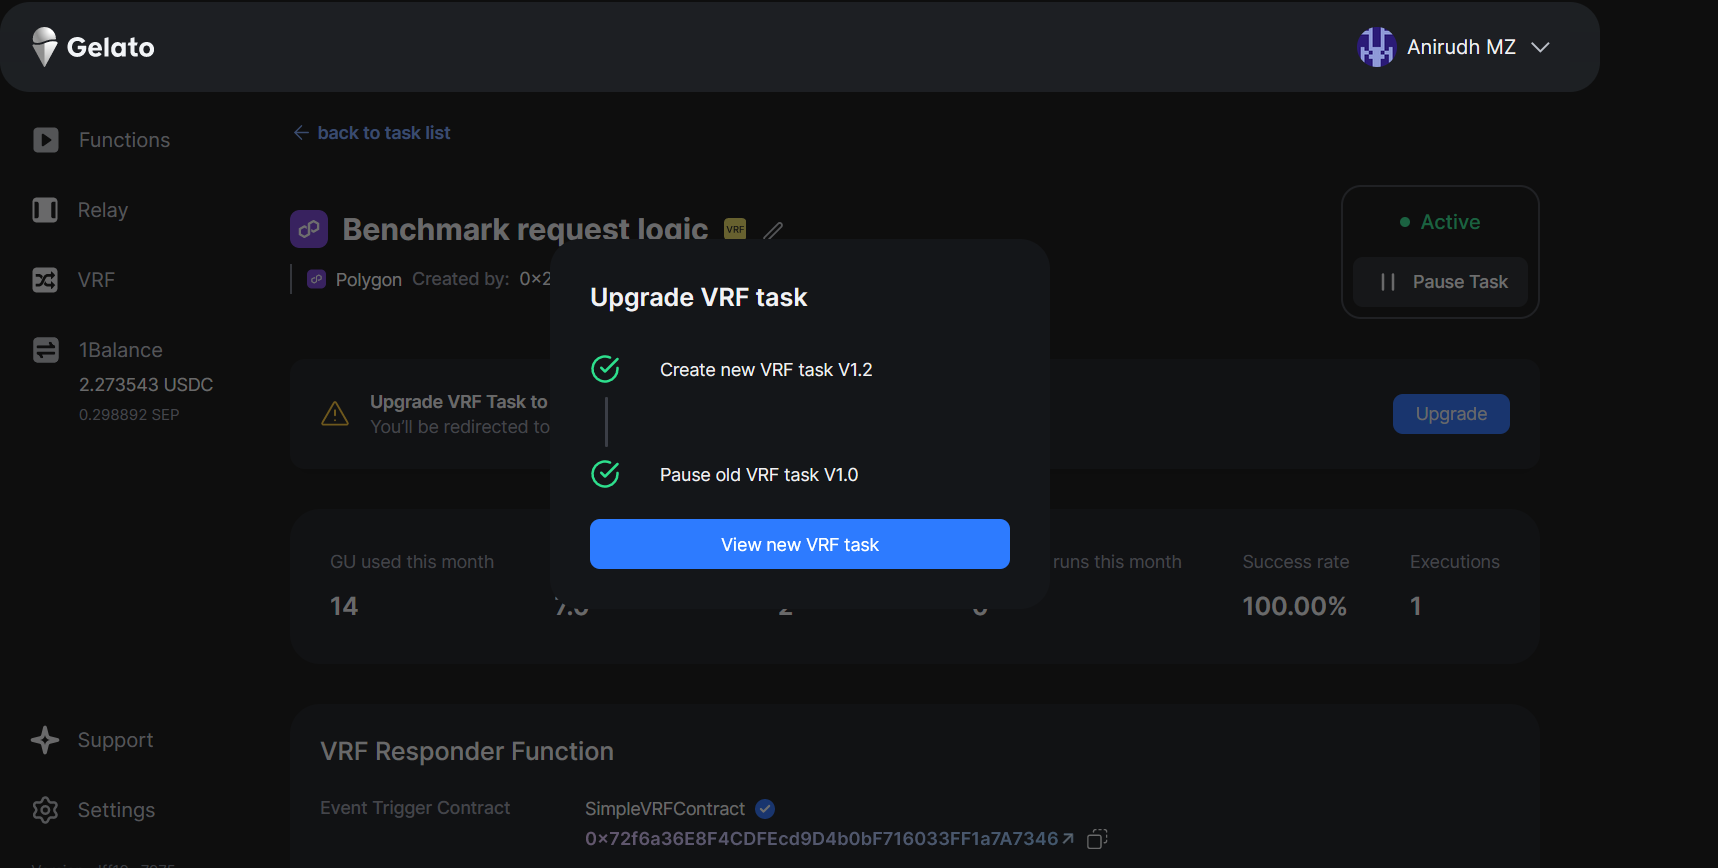
- A transaction prompt will appear asking you to confirm the upgrade. This process will create a new task and simultaneously pause the old one.
- After confirming the transaction, you will notice that the task label updates to “VRF v1.2,” indicating that the upgrade is complete.
1. Gather Necessary Addresses
Before you begin, make sure you have the address of your requester contract at hand. This will be essential for the deployment process.Head over to the VRF Quick Start guide to learn how to prepare your contract for requesting randomness.
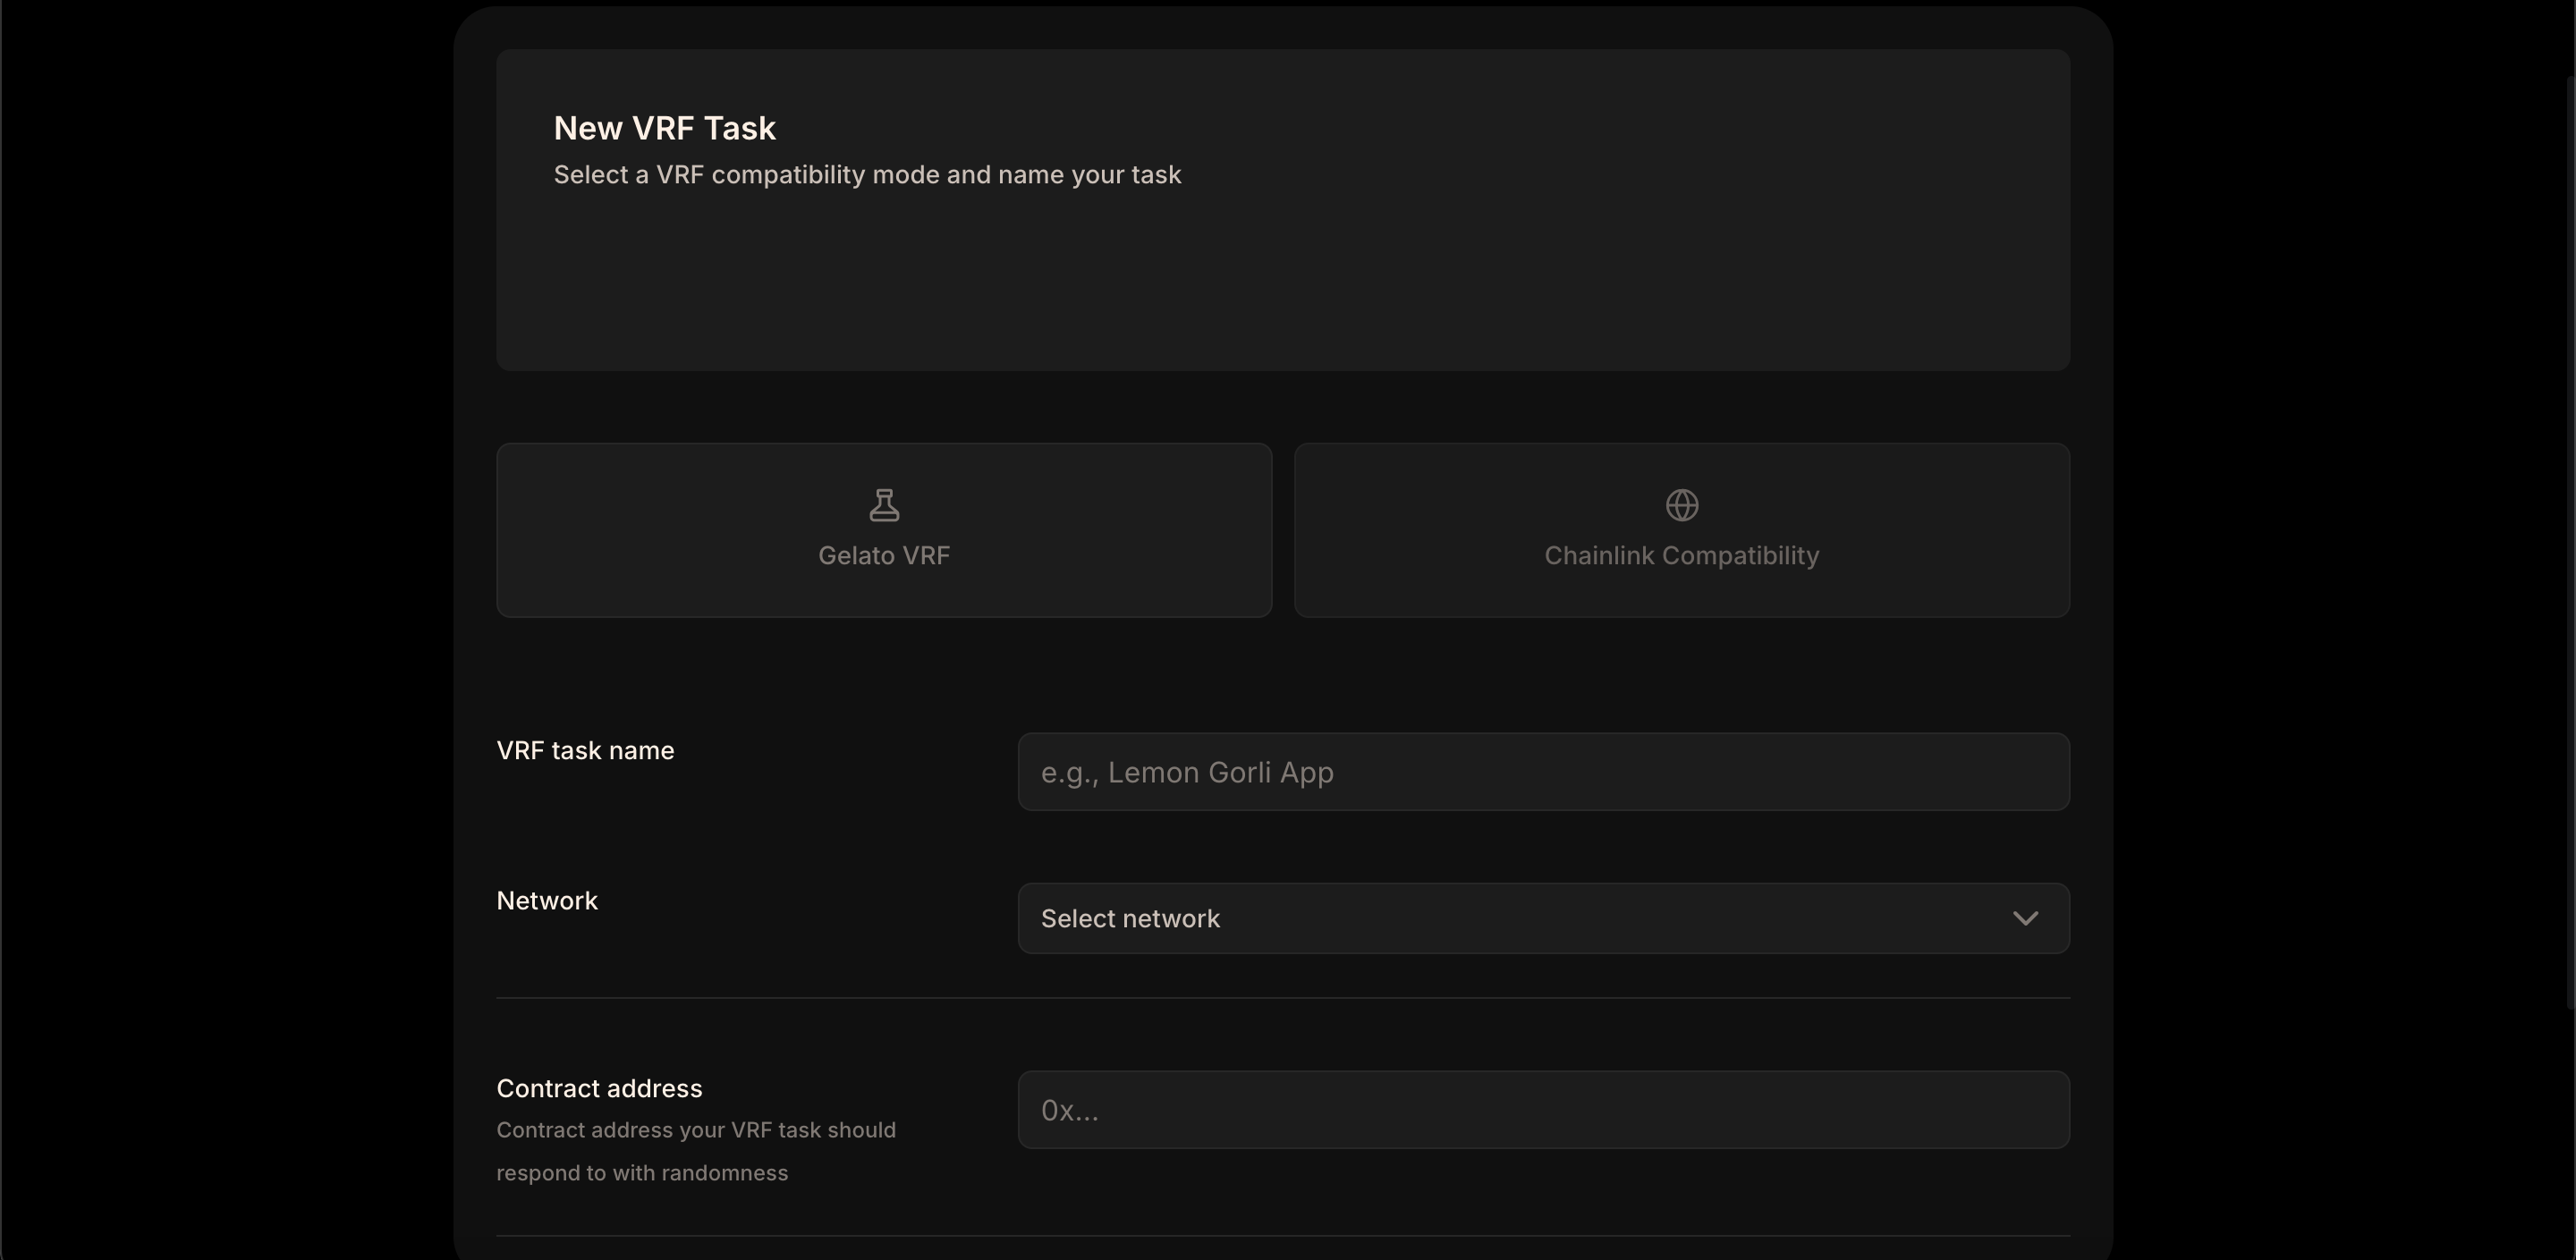
2. Access the VRF Deployment Portal
Navigate to the Gelato app.3. Choose your VRF Type
When prompted to select the VRF type, opt for “Gelato VRF”. If you previously deployed a Chainlink consumer contract and wish to transition, refer to the Migrate from Chainlink VRF section. Or, if you already have a VRF task and want to cover all the missing events, you can set up a fallback task to ensure completeness, refer to the Create a Fallback VRF section.4. Select Deployment Network
Ensure you choose the same network where both your VRF requester and receiver contracts are deployed.